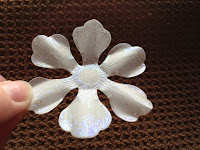
Saturday 20 September 2014

Heartfelt Creations Thank You for Understanding Card

Thank You for Understanding


Heartfelt Creations Products Used:
·         Stamp –Arianna Blooms PreCut Set                                     SKU: HCPC 3608
·         Stamp –Arianna Blooms Die                                                 SKU: HCD 748
·         Die Set –Arianna Lace (Spell Binders)                                   SKU: HCD 747
·         Paper -Arianna Blooms Paper Collection                               SKU: HCDP 244
·         Die Set –Raindrops on Roses                                                SKU: HCD 743
·         Spell Binders –Labels Eighteen

Materials Used:
·         Cardstock
·         Adhesive
·        3-D Foam Squares
·        Cutter
·         Liquid Glue
·         Scoring Board with Scoring Tool
·         Heat Gun
·         Clear Embossing Powder
·         Color Box Chianti Ink
·         Seed Beads -Raspberry
·         Sookwang (double sided adhesive sheet)
·         Gilding Flakes –Harvest Moon

Product Instructions:
Base Card

1)      Cut cardstock 7” x 10”
2)      Fold in half long ways
3)      Cut a pattern paper from Arianna Paper Collection a 7” x 4   5/16”
4)      Adhere the pattern paper to cardstock


Decorative Piece with Gilding Flakes

1)      Cut the decorative piece from the Heartfelt Raindrops on Roses die cut from a pattern piece of paper from Arianna Paper Collection
2)      Trace the decorative piece onto the back of the Sookwang adhesive sheet and cut out


3)      Adhere the decorative piece onto one side of the Sookwang sheet that you cut out
4)      Place  the gilding flakes loosely on top of the sticky part of the decorative piece
5)      Using a Scrubit cleaning pad rub on top of the gilding flakes to adhere them to the adhesive sheet


 Sentiment Piece

1)      Cut out the largest Spell Binder label in the dark pattern paper
2)      Cut out the second largest Spell Binder label in lighter pattern paper
3)      Stamp your sentiment on the lighter pattern paper using Color Box Ink
4)      Emboss the sentiment using clear embossing powder
5)      Using 3D foam squares to place the lighter paper on the dark paper
6)      Using 3D foam squares to place the completed sentiment onto the card


Creating Flowers
Flowers
1)      Stamp Arianna Blooms with Chianti Color Box ink on white cardstock four times
2)      Cut out all of the flowers using Arianna Die Cut
3)      Shape all the petals (as described below)
4)      Glue 4 petals of the same size on top of each other
5)      Glue seed beads into the middle of the flowers
6)      Glue flowers onto the card


Shaping the Petals:
a)      Spritz the back of the petal with water
b)    Turn the petal upside down on a foam mat (stamp facing down)
c)      Using a stylus gently press down from the base of the flower pulling out towards the tip of the petal (this breaks down the fiber of the vellum, making it more pliable)
d)      Once you have done all the petals you will start folding each petal in half
e)     Turn flower over (stamp side up) and then bend the corners up like ears, creating a ripple effect

f)      Continue to pleat the petals as many times as you can, which will depend on the size of the petal


Friday 19 September 2014

Heartfelt Creations "Thinking of You" Tri-Fold Card

"Thinking of You" Tri-Fold Card


Heartfelt Creations Products Used:
·         Stamp –Arianna Blooms PreCut Set                                       SKU: HCPC 3608
·         Die Set –Arianna Lace (Spell Binders)                                   SKU: HCD 747
·         Die Set –Raindrops on Roses                                                  SKU: HCD 743
·         Paper -AriannaBlooms Paper Collection                               SKU: HCDP1 244
·         Spell Binders –Labels Eighteen

Materials Used:
·         1 -12 x 12 Cream Cardstock
·         Vellum
·         Adhesive
·        3-D Foam Squares
·        Cutter
·         Liquid Glue
·         Scoring Board with Scoring Tool
·         Heat Gun
·         Clear Hologram Sparkle Embossing Glitter
·         Tim Holtz –Victorian Velvet Ink
·         Dauber
·         Versa Mark Ink

Product Instructions:
Creating Tri-Fold Base
Tri-Fold Base Card
1)      Cut cream cardstock to 5.5” x 12”
2)      Score on the long side at 2”, 4”, 8”, 10”
3)      Turn paper 90ยบ to the left
4)      Measure 1.5” from the long side and place your ruler along that line
5)      Using a craft knife cut along that 1.5” line between the 2” & 10” score lines
        

6)      Repeat step #4 & #5 along the other long side of the card
7)      Fold each section of the card as shown below


Pattern Paper for Card
Polka Dot Paper
1)      Using the card as a template trace the T-shape onto the back of the polka dot paper twice
2)      Cut out both the T-shape polka dot papers
3)      Using a dauber, ink all the edges of the polka dot paper using Tim Holtz Victorian Velvet

Green Paper
1)      Cut out the following:
4 – 1.5” x 2”
2 – 1.5” x 4”
1 -2.5” x 4”
2)      Using a dauber, ink all the edges of the green dot paper using Tim Holtz Victorian Velvet

**Using score tape adhere the Green and Polka Dot pattern paper onto the base of the Tri-Fold Card base. (see picture below)


Creating Vellum Flowers
Flowers
1)      Stamp Arianna Blooms with Versa Mark on vellum five times and emboss them with the Clear Hologram Sparkle Glitter
2)      Cut out all of the flowers using Arianna Die Cut

Each flower is made up of both petals and buds. Listed below is what size of flower to use to create the 3-D effect, as well if they are shaped as petals or buds (instructions below for each).

Large Flower (on green)
     -2 of the second largest flower ~shape both as petals
     -1 second smallest flower ~shape as a bud
     -1 smallest flower ~shape as a bud

Large Flower (on front)
     -2 of the second smallest flower ~shape both as petals
     -2 of the smallest flower ~shape both as buds

Small Flower (on left front)
     -2 of the smallest flower ~shape both as petals
     -1 smallest flower ~shape as a bud

Small Flower (on right front)
     -2 of the smallest flower ~shape both as petals
     -2 of the smallest flower ~shape both as buds

Shaping the Petals:
a)      Turn the petal upside down on a foam mat (stamp facing down)
b)      Using a stylus gently press down from the base of the flower pulling out towards the tip of the petal (this breaks down the fiber of the vellum, making it more pliable)
c)      Once you have done all the petals you will start folding each petal in half
d)     Turn flower over (stamp side up) and then bend the corners up like ears, creating a ripple effect
e)      Using stylus, circle the center of the flower causing the petals to come up in the shape of a flower


Shaping the Buds:
a)      Stamp face up on a foam mat
b)      Using a stylus gently press down from the base of the flower pulling outwards to the tip of the petal
c)      Circle the center of the flower until the petals come up towards the center of the flower
d)     Continue until the petals are up into a flower bud

**For each flower use the liquid glue to adhere the petals together with the buds in the middle on top
–to glitter the center of the flowers use a Q-tip in Versa Mark and emboss with the clear hologram sparkle glitter


Paper Embellishments for Card
Yellow Paper (3 different pieces)
1)      Cut out a 3.5” circle and distress edges
2)      Cut out a 5/8” x 3.75” rectangle and distress edges
3)      Cut out a 2  3/16” x 1   3/16” rectangle, slightly invert corners (so it looks like a ticket) and distress edges
4)      Using the ‘Spellbinders Labels Eighteen’ second smallest tag, cut out and distress the edges

Vellum (flowers and decorative pieces)
Decorative Pieces
1)      Cut out the lattice piece and cut 1.5” off the opposite sides
2)      Cut out 2 of the decorative swirls
3)      Using a dauber Versa Mark ink over all 4 decorative pieces and emboss them with the Clear Hologram Sparkle Glitter

Arianna Paper
1)      Cut out the circle with the three flowers in it
2)      Cut out the “Think of you” ticket sentiment or another sentiment of your choice
3)      Cut out a long “Live in the Moment” or another sentiment of your choice to adhere to the long yellow rectangle


Assembling the Card (see picture below)
1)      Using 3D Foam Squares adhere the sentiment ticket to the yellow paper ticket
2)      Using the liquid glue adhere the three smaller flowers to the flowers on the circle
3)      Using 3D Foam Squares adhere the circle with three flowers on it to the yellow circle
4)      Continue to adhere the rest of the embellishments you have created to the card as shown below


Heartfelt Creations Cherish Card

Cherish Card

Heartfelt Products used:
·        Die Set - Arianna Bloom         SKU: HCD 748
·        Stamp - Arianna Blooms PreCut Set              SKU: HCPC 3608
·        Paper - Arianna Blooms Paper Collection      SKU: HCDP1 244
·        Open Leaf PreCut Set                                      SKU: HCPC 3545
·        Classic Leaf Die                                            SKU: HCD 736
·        Spellbinders –Majestic Labels Twenty Five     

Materials used:
·        Pan Pastels
·        Small sponge makeup applicator
·        Boning knife
·        Medium stylus
·        Small misting bottle
·        Water proof Ink
·        Tim Holtz Distress Ink – Forest Moss
·        3-D Foam Squares
·        Score tape
·        Art Glitter Glue
·        Micro Beads

Assemble the Base of the Card
1.     Cut cardstock –10.5 x 7.25
2.     Score and fold in half
3.     Cut a of pattern paper from the Arianna Blooms Collection – 5.25 x 7.25
4.     Use Score tape to attach Arianna Blooms paper to the cardstock
5.     Cut out Spellbinder shapes (refer to photo below)


6.     Glue the large shape to the Arianna Blooms paper leaving small border around the edge
7.     Use 3-D foam squares attach the small shape in the center

Creating Flowers and Leaves
1.     Stamp with the Arianna Blooms 2 times
2.     Cut flowers using the co-ordinating die
3.     Rub the pastel onto the tip of the petal, blending it all the way down the petal with a small sponge makeup applicator.
4.     Cut out 7 small and 2 medium stamens
5.     Stamp with the Open Leaf PreCut Set 2 times
6.     Cut out with co-ordinating die (Classic Leaf Die)
7.     Distress with Tim Holtz ink

Shaping Flowers
1) Mist flower on the back
2) Hold flower between your thumb and first two fingers, stamp side up
3) With the boning knife, press the base of the petal onto your thumb, working it out towards the tip of the petal curling it back as you go
4) Do this for all of the petals
5) With a stylus gently press in a circular motion around the base of the curled petal to draw the petals inwards
6) Using the stylus in a circular motion, press the centre of the stamens to draw them up

Assembling Flower
1)     Glue stamen into each flower
2)      Glue microbeads into the center of each stamen

Shaping Leaves
1.     Use stylus to press down on the outer edge of leaf, working it towards the centre

Assembling the Rest of the Card
1.     Have the card facing you in a landscape format
2.     Glue 6 flowers onto the upper right corner
                                                        a) 3 of the smallest flowers
                                                      b) 1 of the next 3 sizes
3.     Glue the remaining flowers to the centre shape on the top right hand corner
4.     Cut out the sentiment
5.     Shape with boning knife
6.     Glue onto the centre shape beside the flowers
7.     Cut out a butterfly from the Arianna Blooms collection
8.       Glue to the bottom left hand corner of centre shape


Friday 12 September 2014

Heartfelt Creations Welcome to my Garden Box Card

Welcome to my Garden


Heartfelt Creations Products used:
·         Die Set - Arianna Bloom                                            SKU: HCD 748
·         Die Set - Arianna Lace                                               SKU: HCD 747
·         Stamp - Arianna Blooms PreCut Set                          SKU: HCPC 3608
·         Die Set - Burnished Key                                             SKU: HCD 741
·         Stamp - Burnished Key PreCut Set                            SKU: HCPC 3569
·         Die Set - Garden Romance                                         SKU: HCD 723
·         Stamp - Mailbox Surprise PreCut Set                         SKU: HCPC 3476
·         Stamp - Holiday Mail PreCut Set                               SKU: HCPC 3490
·         Paper - Arianna Blooms Paper Collection                  SKU: HCDP1 244
·         Spellbinders – Majestic Labels TwentyFive    

Materials used:
·         8.5” x 8.5”,  7.75” x 7.75” Cardstock
·         Vellum
·         Spellbinder Precious Metal
·         Pan Pastels
·         Small sponge makeup applicator
·         Medium stylus
·         Small misting bottle
·         Glitter
·         Ribbon
·         Water proof Ink
·         Tim Holtz Distress Ink – Tea Dye
·         3-D Foam Squares
·         Score tape
·         Art Glitter Glue


Product Instructions:
Creating the Box & Lid
1)      Cut out the following:
i)        1 - 8.5”x 8.5” (box)
ii)      1 - 7.75”x 7.75” (lid)
2)      Take your largest piece and score 1.25” all the way around, this will create an inner square with squares               on all four corners.
3)      Cut on the score line going up to the 1.25” meeting with the score line going across, do the two that are   on the same side, turn paper so that your cuts are on the top, now cut twice more on the side facing you.
4)      Fold on your score lines, making sure that their nice and crisp.
5)      Place your score tape on the corners you have just cut with the flaps on the outside. Do all     four corners, creating the bottom part of your box.
6)      For the lid you will score .75” all the way around.
7)      Cut up to your score line just as you did for the base.
8)      Fold, and tape flaps on the inside this time.

Creating Flowers
1)      Stamp with your Arianna Blooms 7 times
2)      Cut out using the co-ordinating die
3)      Cut out 20 small stamens
4)      Dip each point of the stamen into glue then into the glitter.
5)      Set aside so that they have enough time to dry.
6)      Rub the pastel onto the tip of the petal, blending it about a quarter of the way down with a small sponge makeup applicator.

Large Flower (inside the box)
- 1 of the smallest flowers
- 1 of the second smallest flowers
- 1 of the third largest flowers
- 2 of the small stamens

2 Medium Flowers (inside the box)
- 1 of the smallest flowers
- 1 of the second smallest flowers
- 2 of the small stamens

2 Small Flowers (inside the box)
- 1 of the smallest flowers
- 2 of the small stamens

Shaping the Petals:
a)      Turn the petal upside down on a foam mat (stamp facing down)
b)      Using a stylus gently press down from the base of the flower pulling out towards the tip of the petal (this breaks down the fiber of the cardstock, making it more pliable)
c)      Once you have done all the petals you will start folding each petal in half
d)     Turn flower over (stamp side up) and then bend the corners up like ears, creating a ripple effect
e)      Using stylus, circle the center of the flower causing the petals to come up in the shape of a flower

For each flower use the Art Glitter glue to adhere the petals together
 Use your stylus, press down the stamen in the middle with a circular motion so that they are quite tight.
Glue two per flower, if you want them to be fuller just add a few more.

Assembling the Inside of your Box
1)      Stamp small birdhouse (Mailbox Surprise PreCut Set)
2)      Cut the birdhouse and fence using the coordinating die (Garden Romance)
3)      Stamp the dove (Holiday Mail PreCut Set), colour then hand cut it out, separating it from the mailbox and swirls
4)      Cut out shape (Spellbinders Majestic Labels Twenty Five set)
5)      Cut the panel of decorated paper along with a sentiment of choice and one small butterfly from the Arianna Blooms paper collection
6)      Tape panel into the bottom of box
7)      Start layering the pieces together, first the Spellbinder shape using 3D Foam Squares
8)      Glue flowers onto the left hand side of the raised surface
9)      Tuck the birdhouse behind the bottom flowers as well as the leafy swirl.
10)  Shape and glue the butterfly onto the top medium flower
11)  Curve the fence, place glue only on the left hand side, and tuck it partway into the flowers, leaving approximately half hanging over the edge to the right
12)  Use two 3D Foam Squares to adhere your bird
13)  Glue the two single flowers to the top right hand corner of the raised surface
14)  Shape and destress the sentiment, then attach with 3D Foam Squares, placing it in-between the two sets of flowers

Assemble the Lid
Large Flower (lid)
- 1 of the smallest flowers
- 1 of the second smallest flowers
- 1 of the third largest flowers
- 2 of the fourth largest flowers
- 2 of the largest flowers
- 2 of the small stamens

1 Medium Flower (lid)
- 1 of the smallest flowers
- 1 of the second smallest flowers
- 2 of the small stamens

2 Small Flowers (lid)
- 1 of the smallest flowers
- 2 of the small stamens


1.      Shape and assemble flowers as before
2.      Stamp images onto the Spellbinder Precious Metal, using the Burnished Key PreCut Set
3.      Heat set
4.      Cut lock and keys with the Burnished Key Die
5.      Cut large lace floret and small narrow applique
6.      Glue the floret in the top left hand corner and the appliques in the bottom right hand corner forming them into a V
7.      Glue the large flower onto the floret and the three smaller ones onto the appliques, with the medium one in the middle
8.      Glue the lock in between them
9.      Cut the “key chain” from Arianna Blooms paper collection and destress
10.  Attach the keys to your key chain
11.  Use one 3D Foam Square to tilt the key chain and place a small amount of glue to hold down the front.

“Pick” a special friend to share in your secret garden!